It Works... YAY!!!!
Published on Mar 11, 2025
It Works... YAY!!!!
Published on Mar 4, 2025
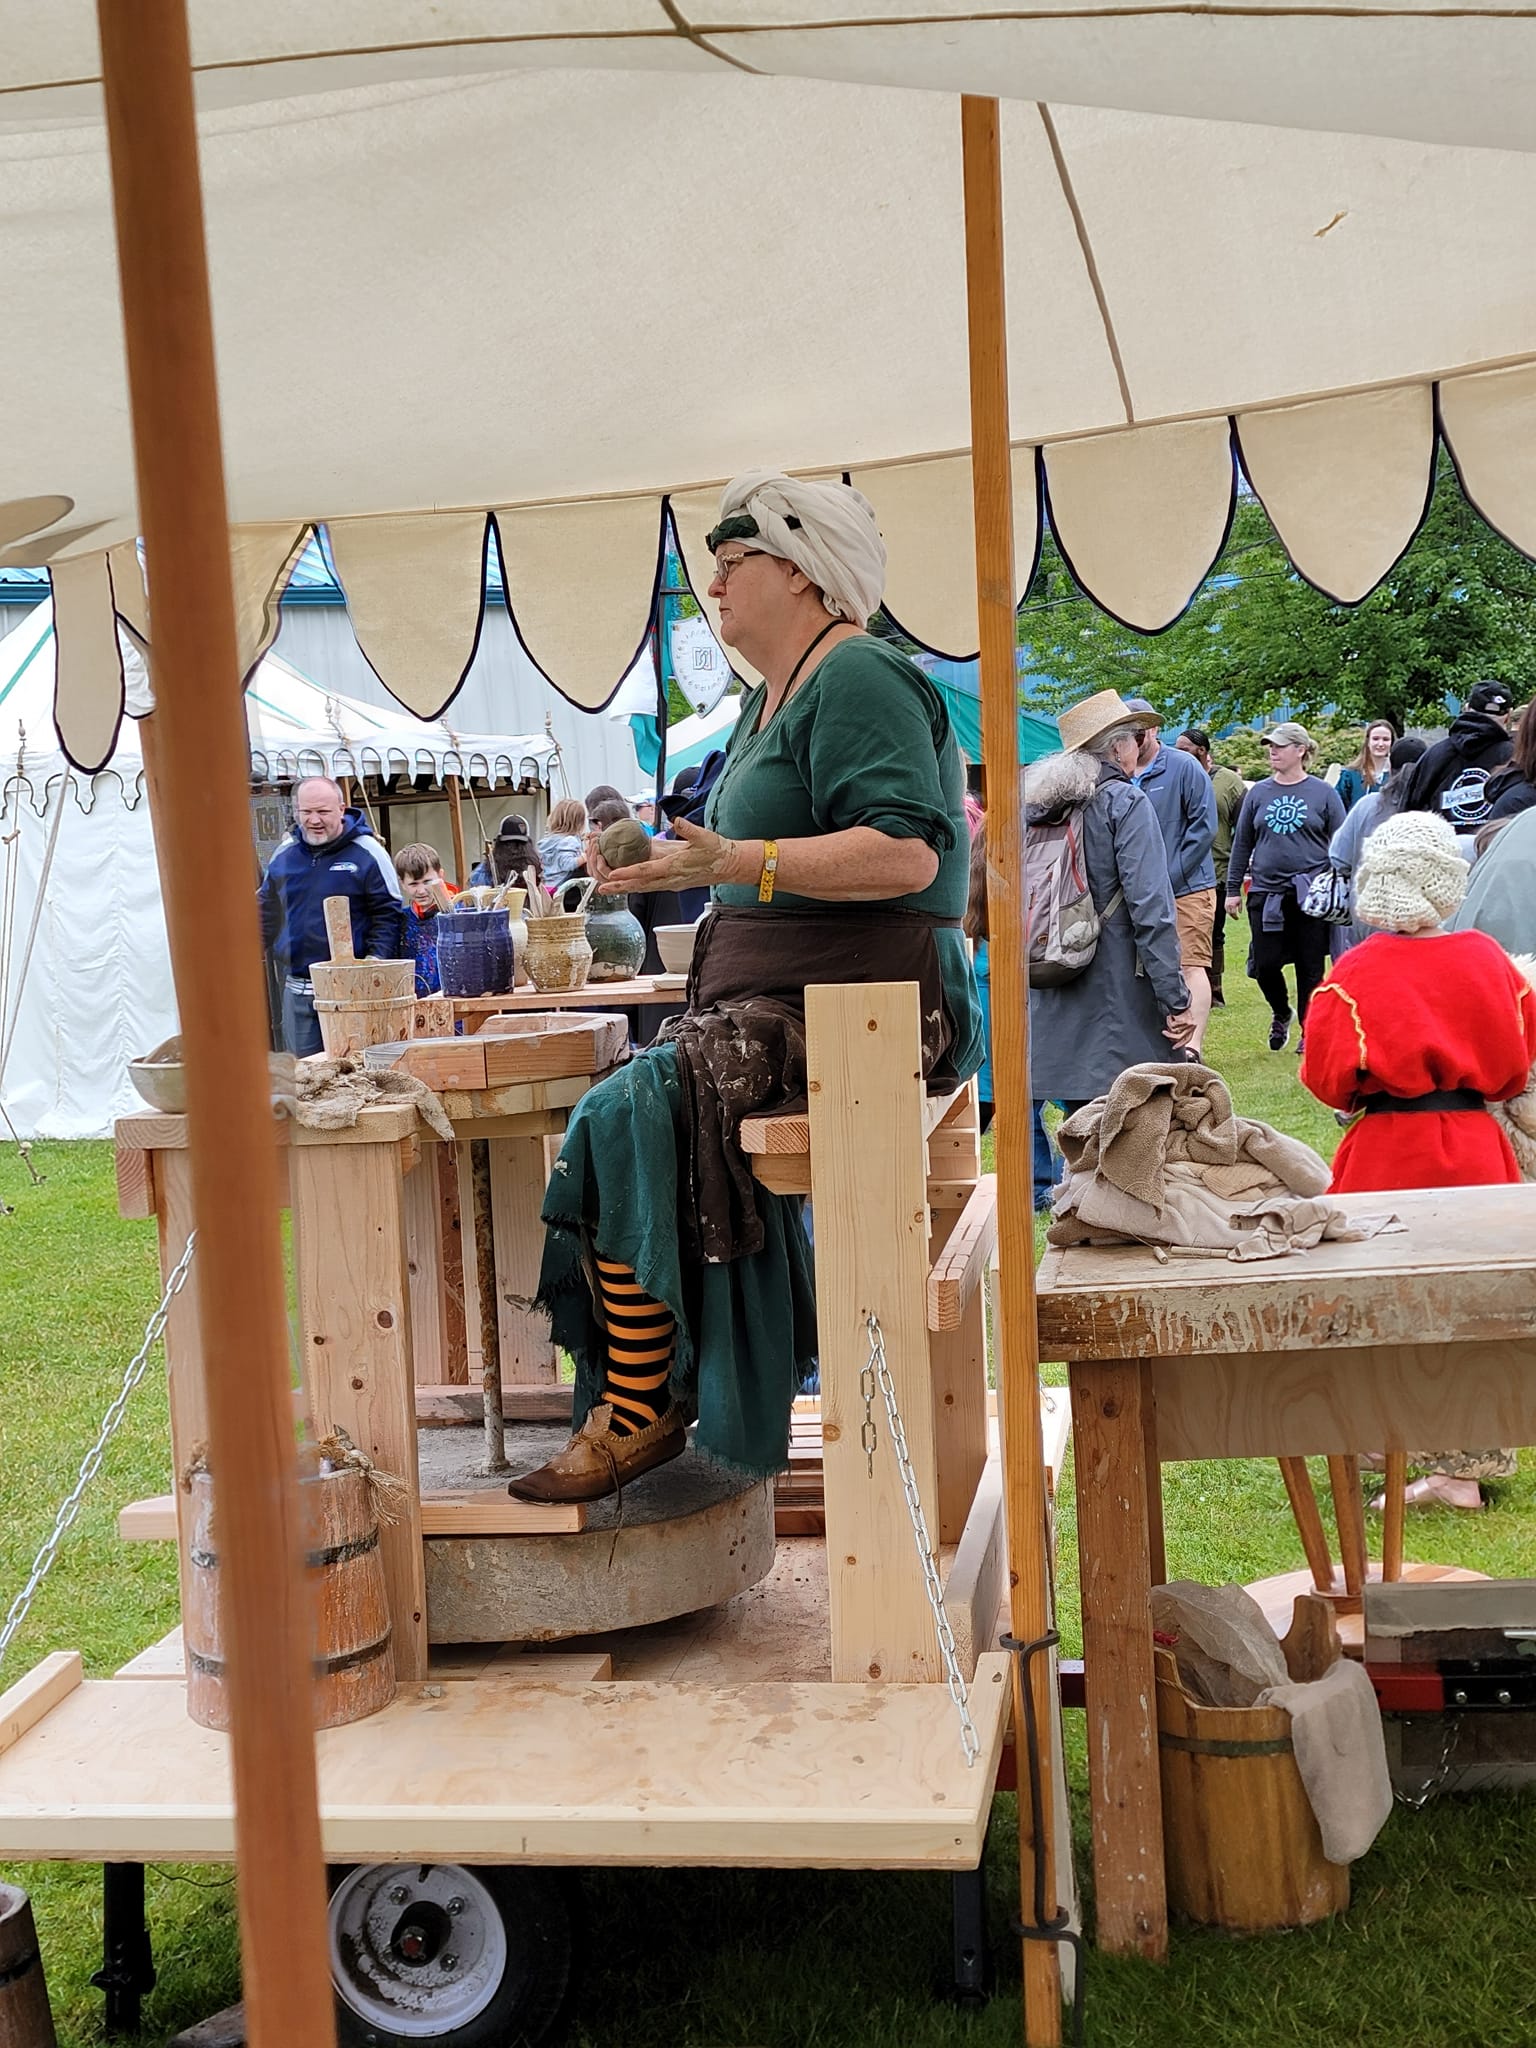
This show the close fit of the sides and kick wheel which was by design. You just tip up the sides and lock them in place. There is heavy chain to support the side decking. I'll see if I have a photo of the finished wheel to illustrate the final build.
At this point the build was largely done. It's first use it didn't even get the stain or weather proofing. I was likely finishing a few bits on site. It's not a real project if your not building the last bits while the 'customer' is watching you. :P
Published on Mar 3, 2025
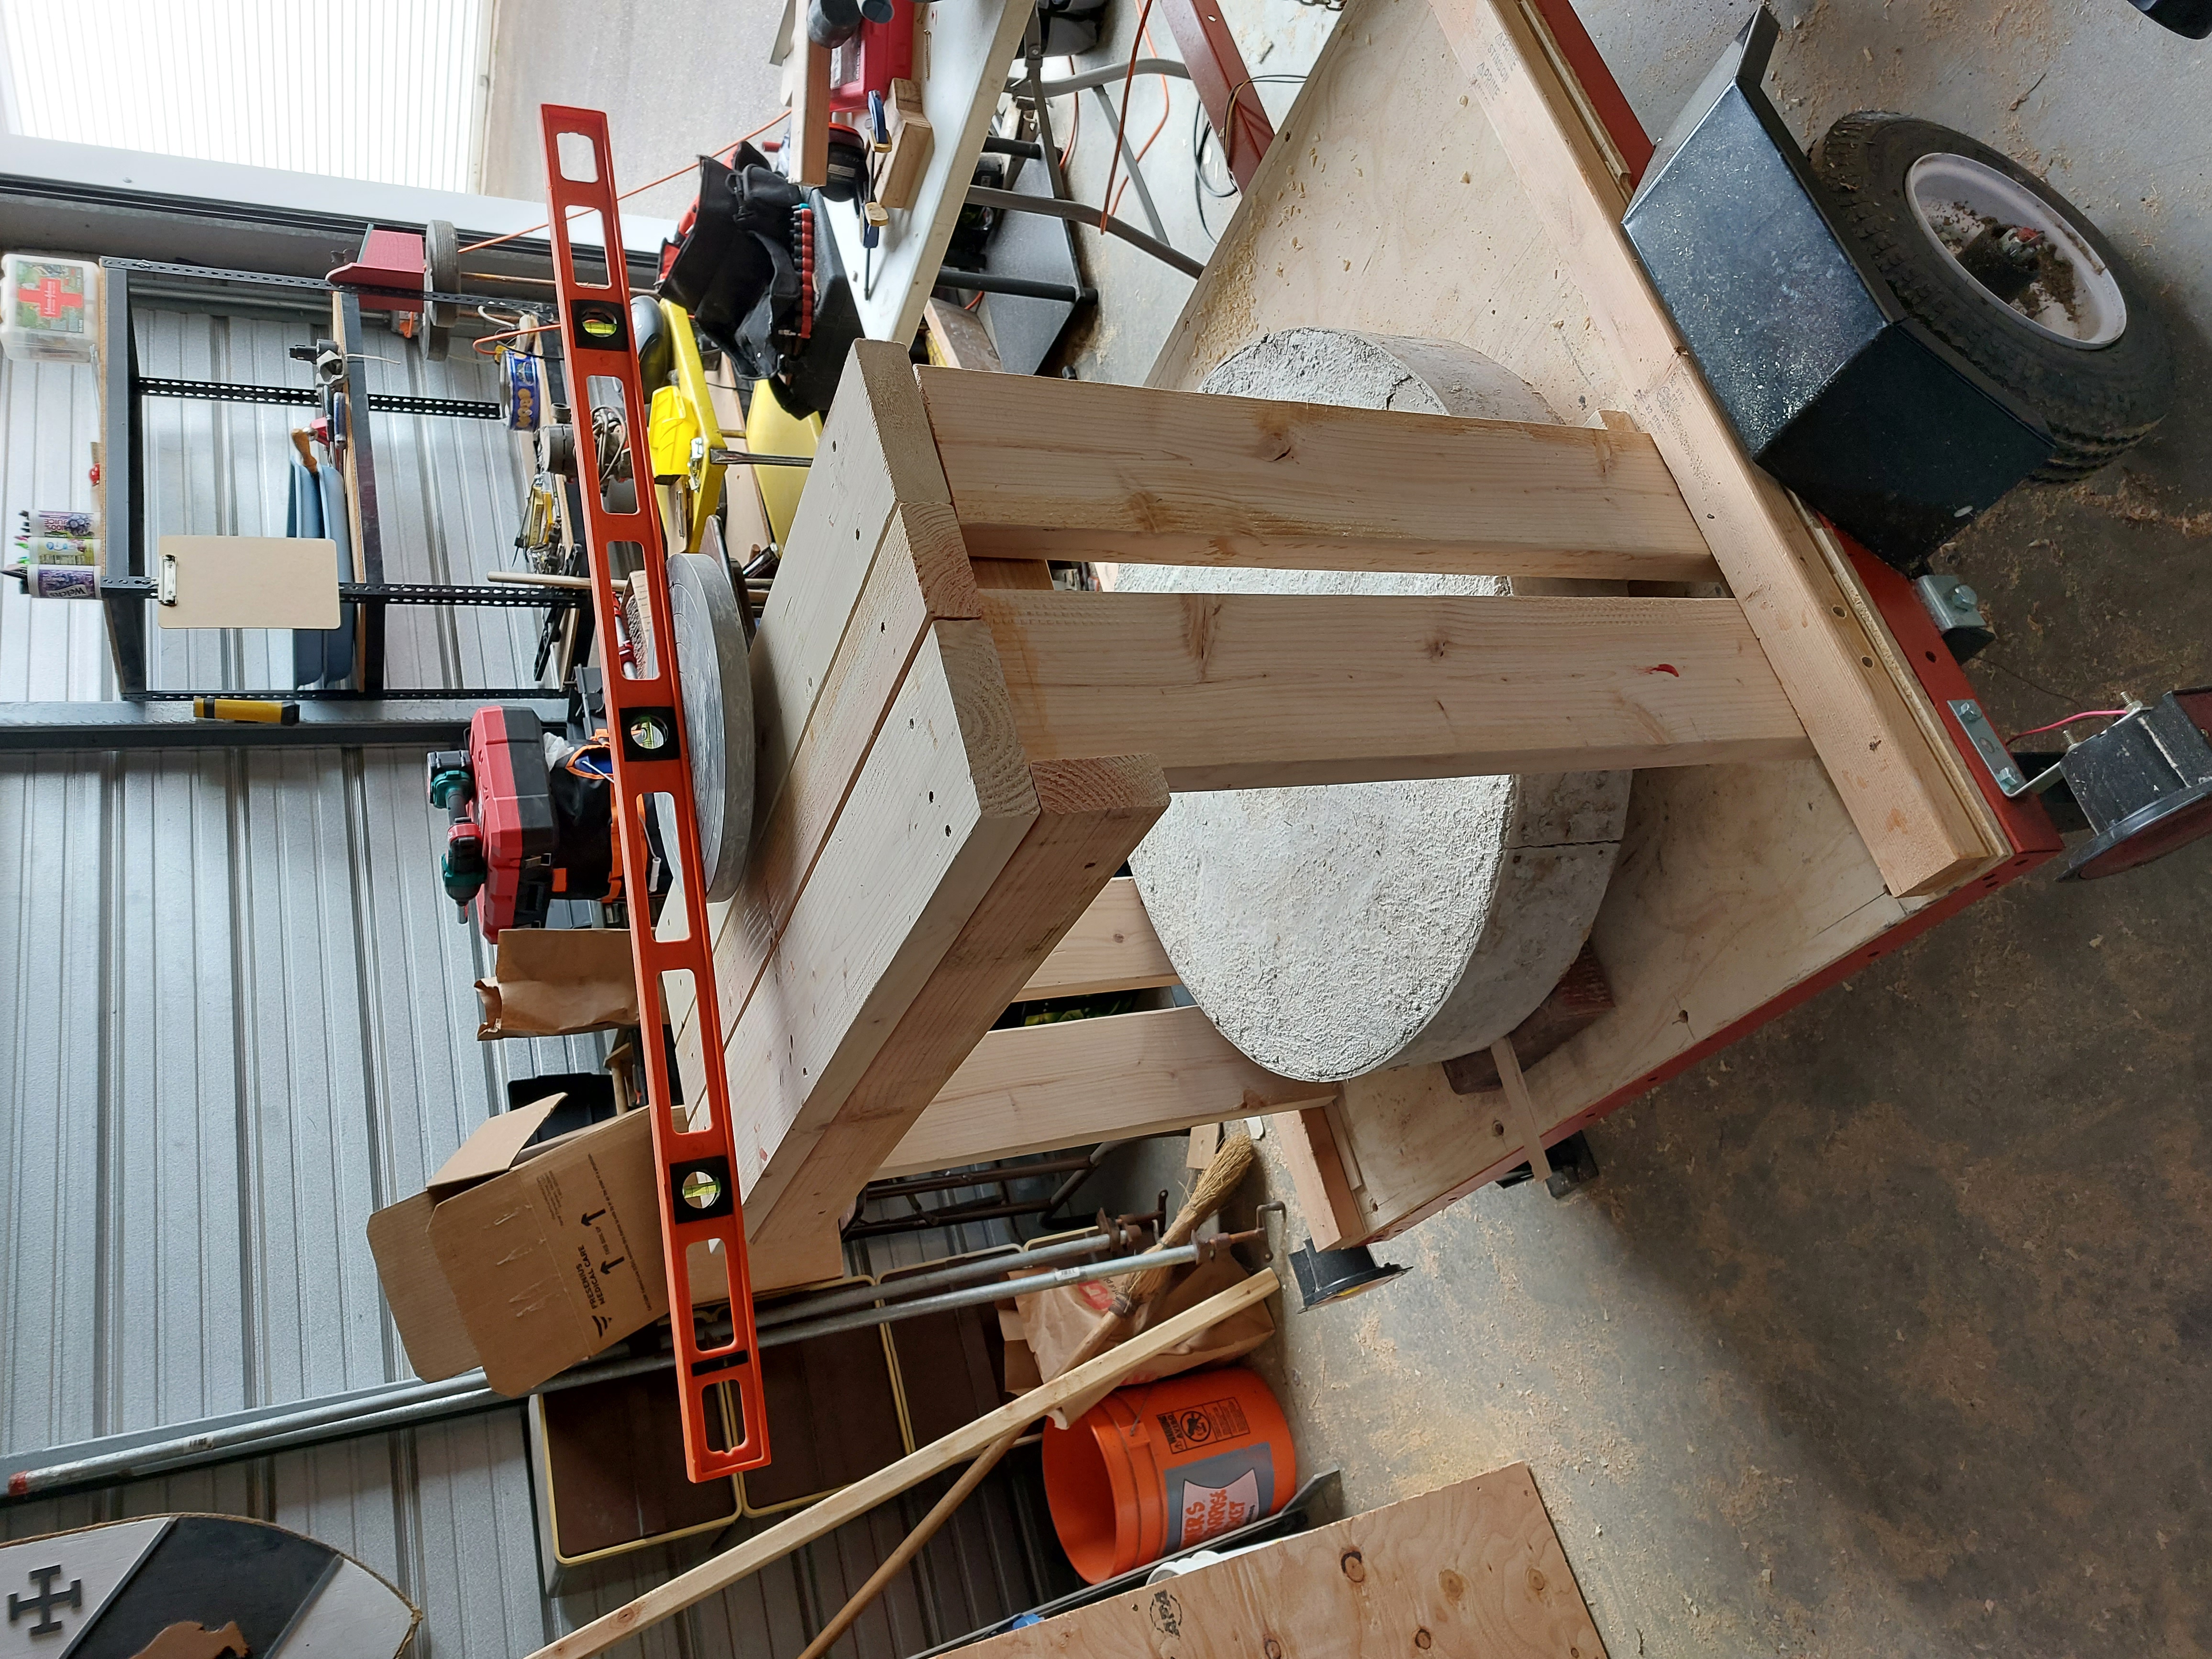
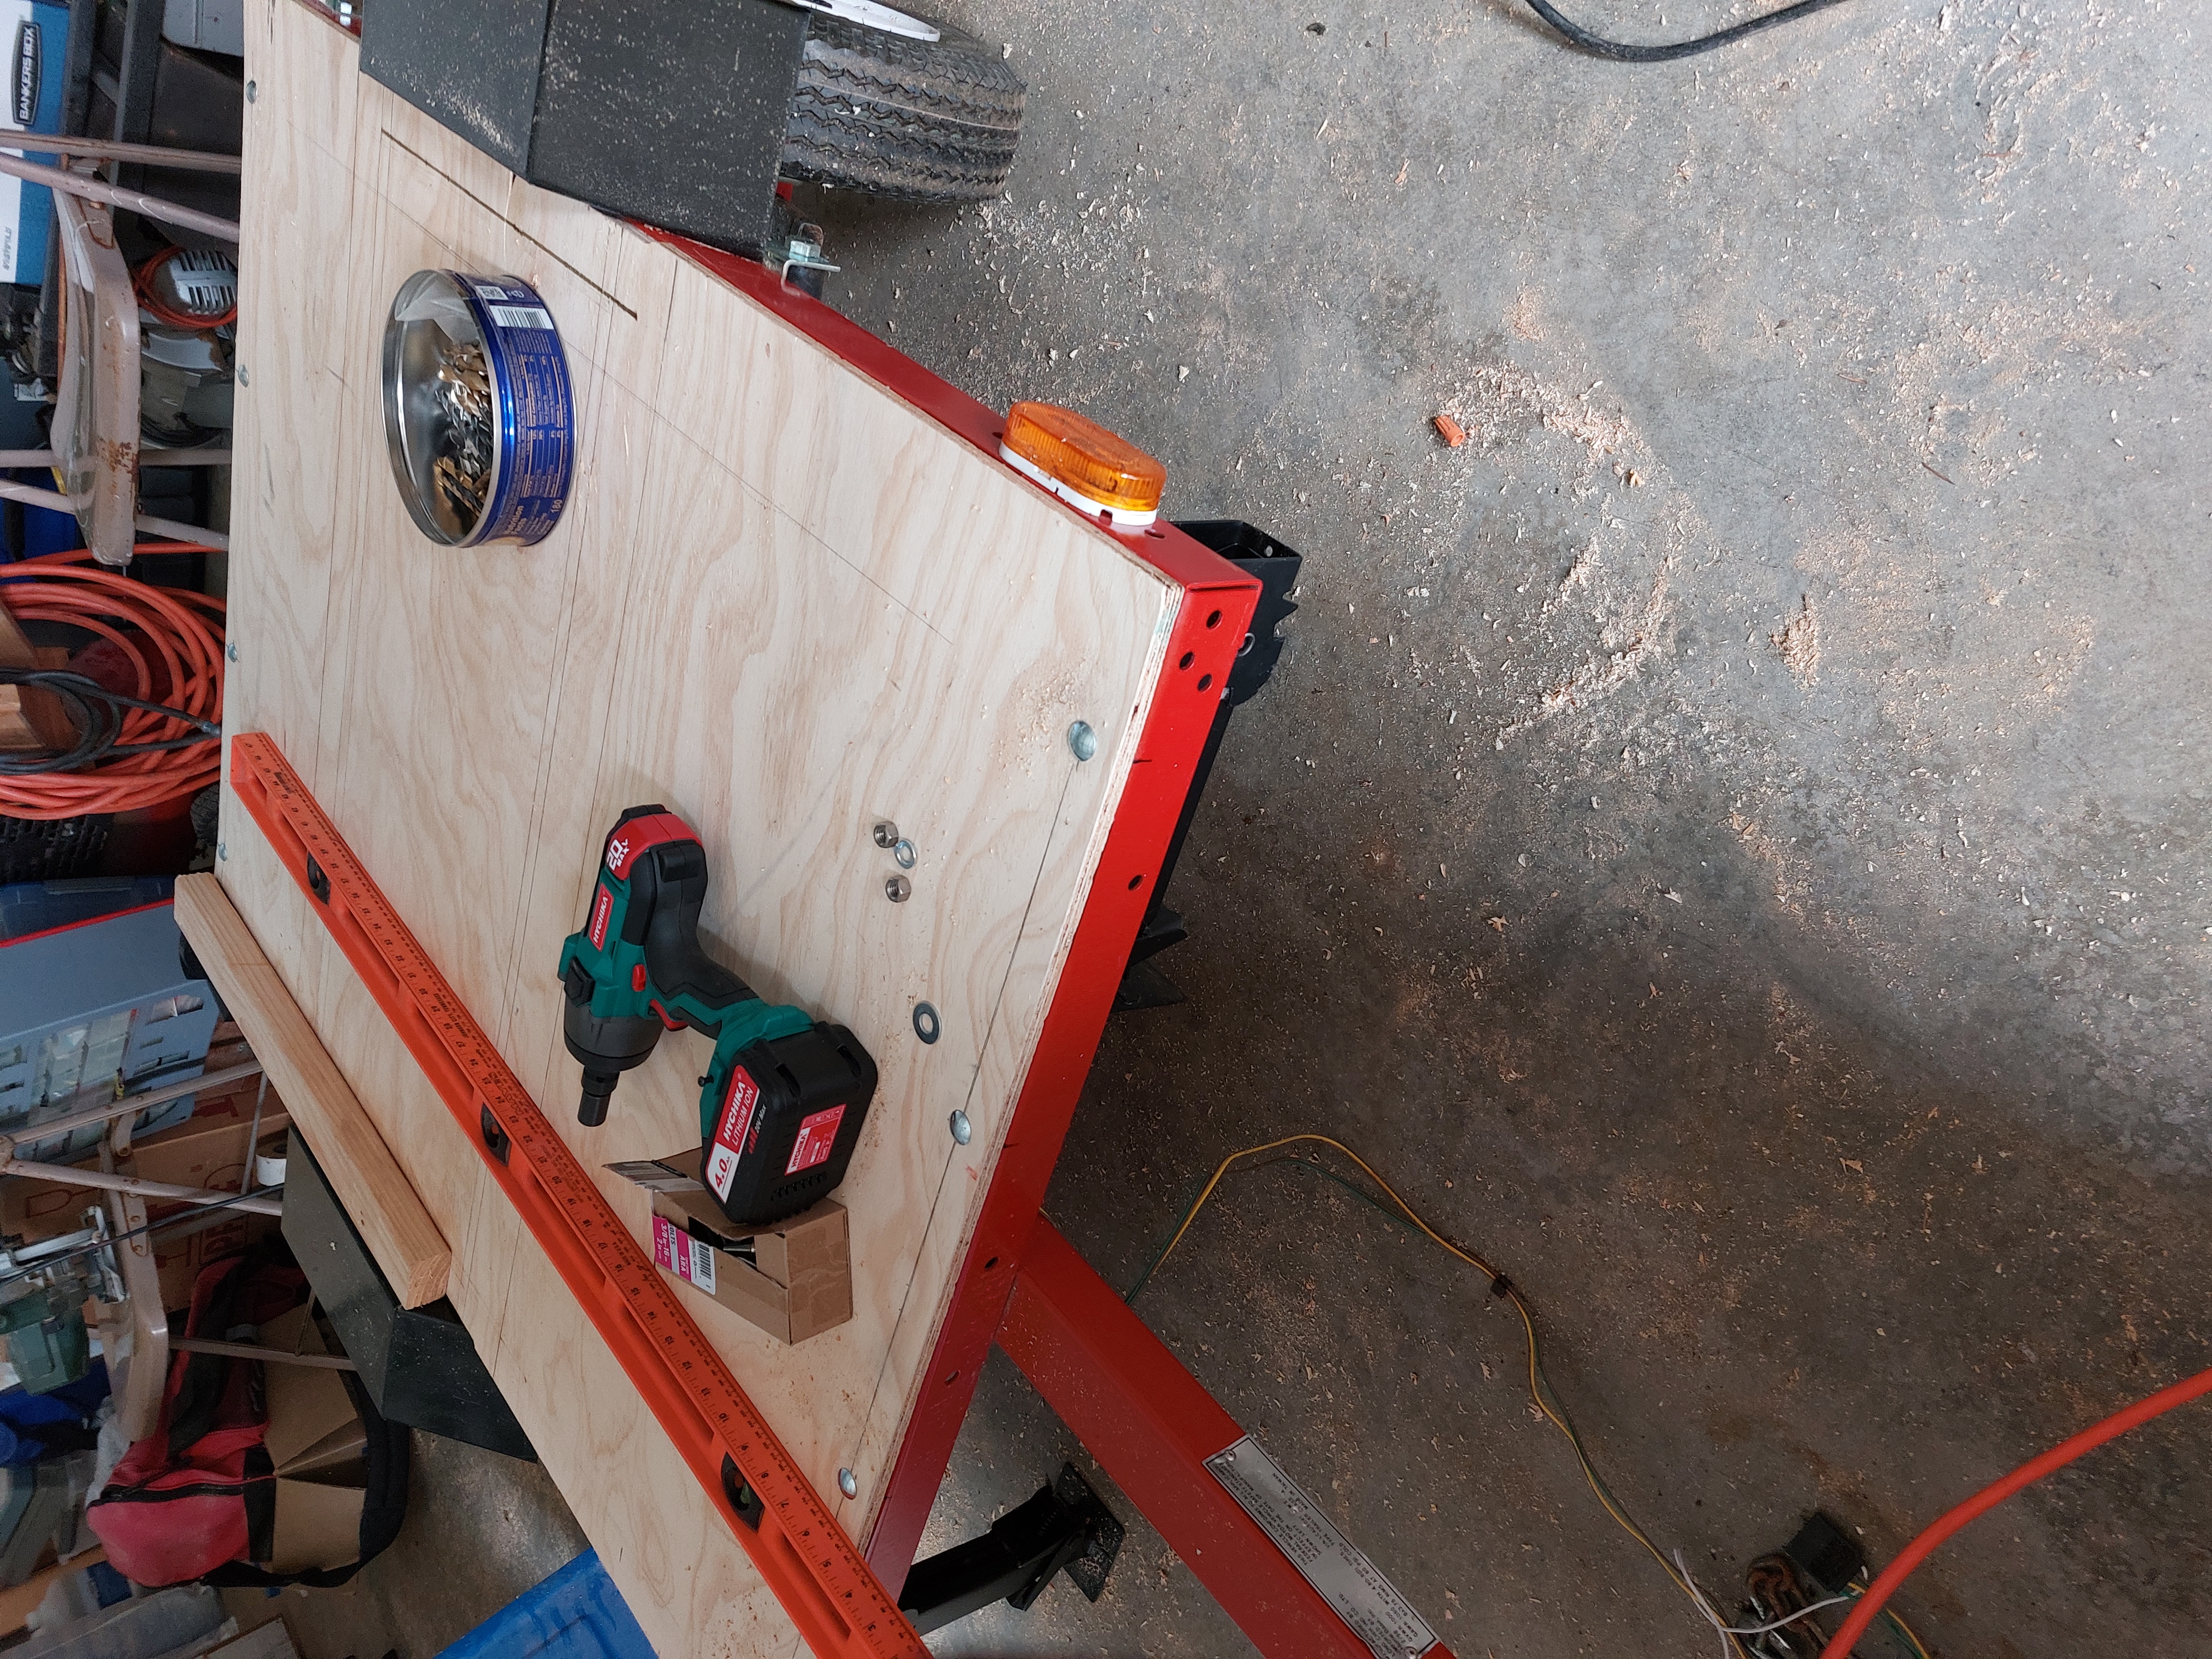
There is likely a proper work terminology for the work surface of a kick wheel. I'm just a duffer making stuff so we'll just call it a table. This is the part where I frame up the table and chair for the kick wheel.
It was decided to used some pretty heavy dimensional lumber and not be skimpy when it came to 'density'. We want this to hold up and last for a bit. Also if the style suggests medieval it works nicely for SCA demos.
The corner levelers really came through for this step. I could fiddle and adjust to get a super level table and wheel because I had a super level deck. YAY!!.
Published on Mar 2, 2025
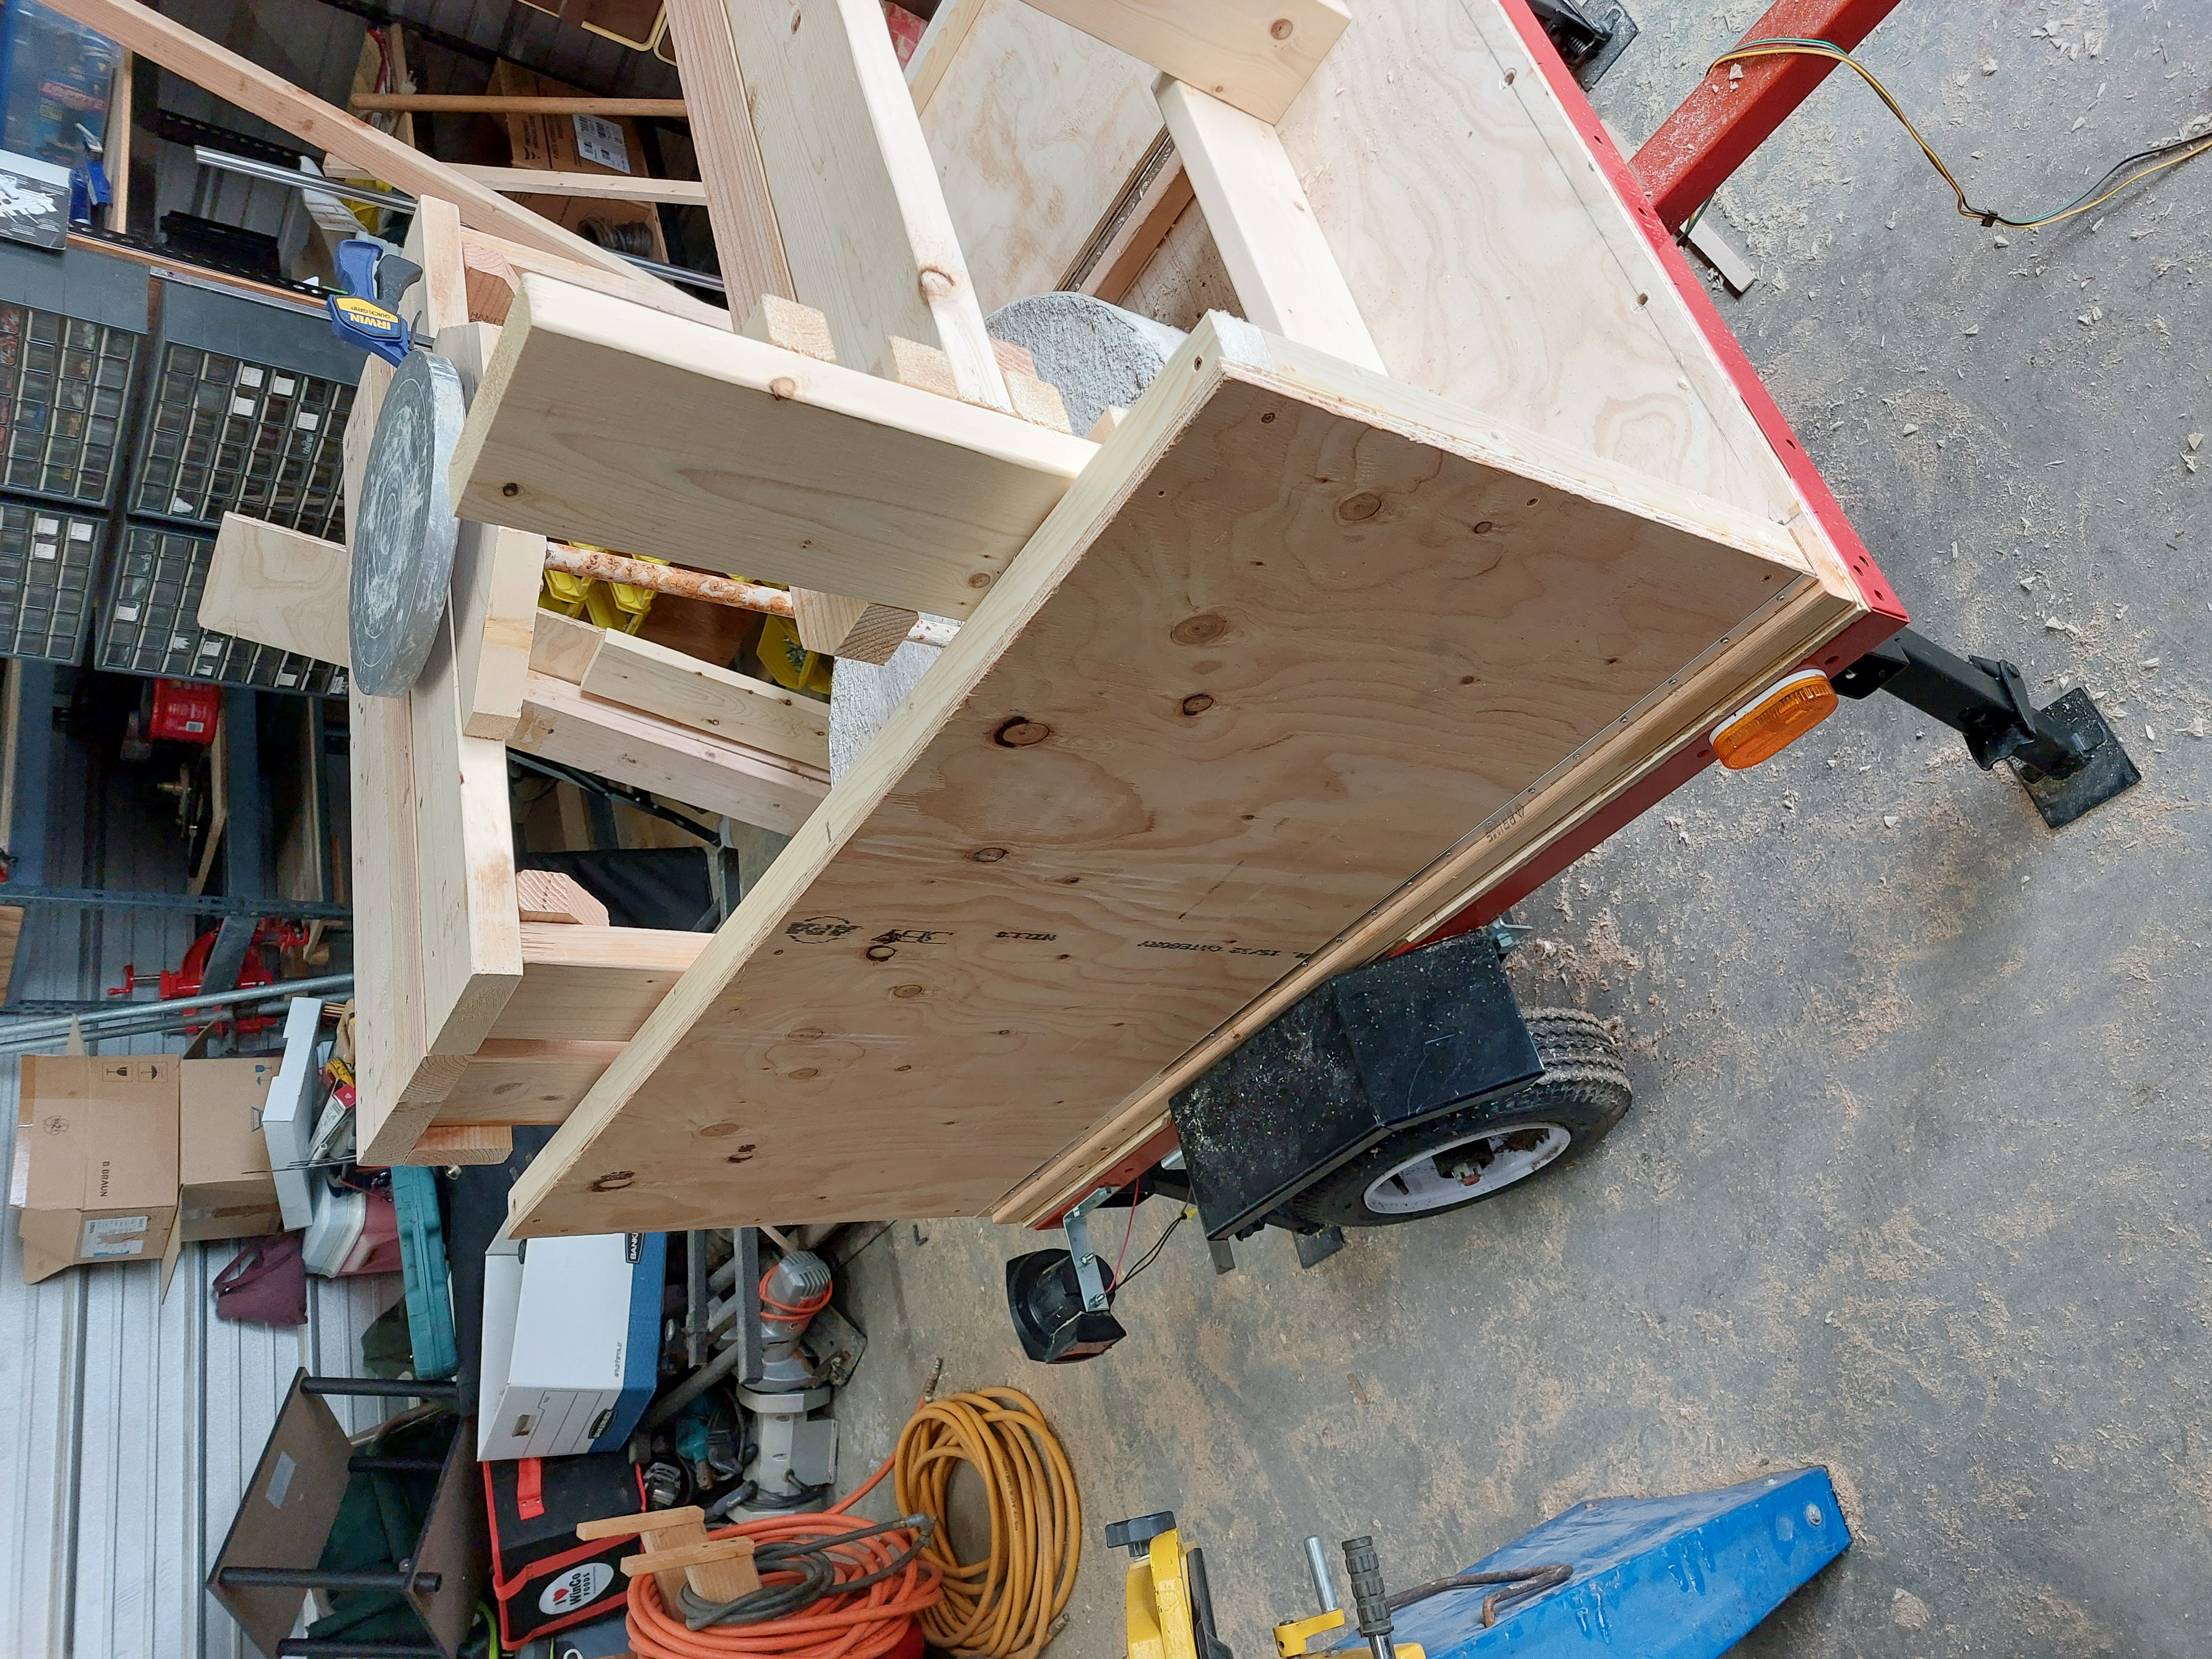
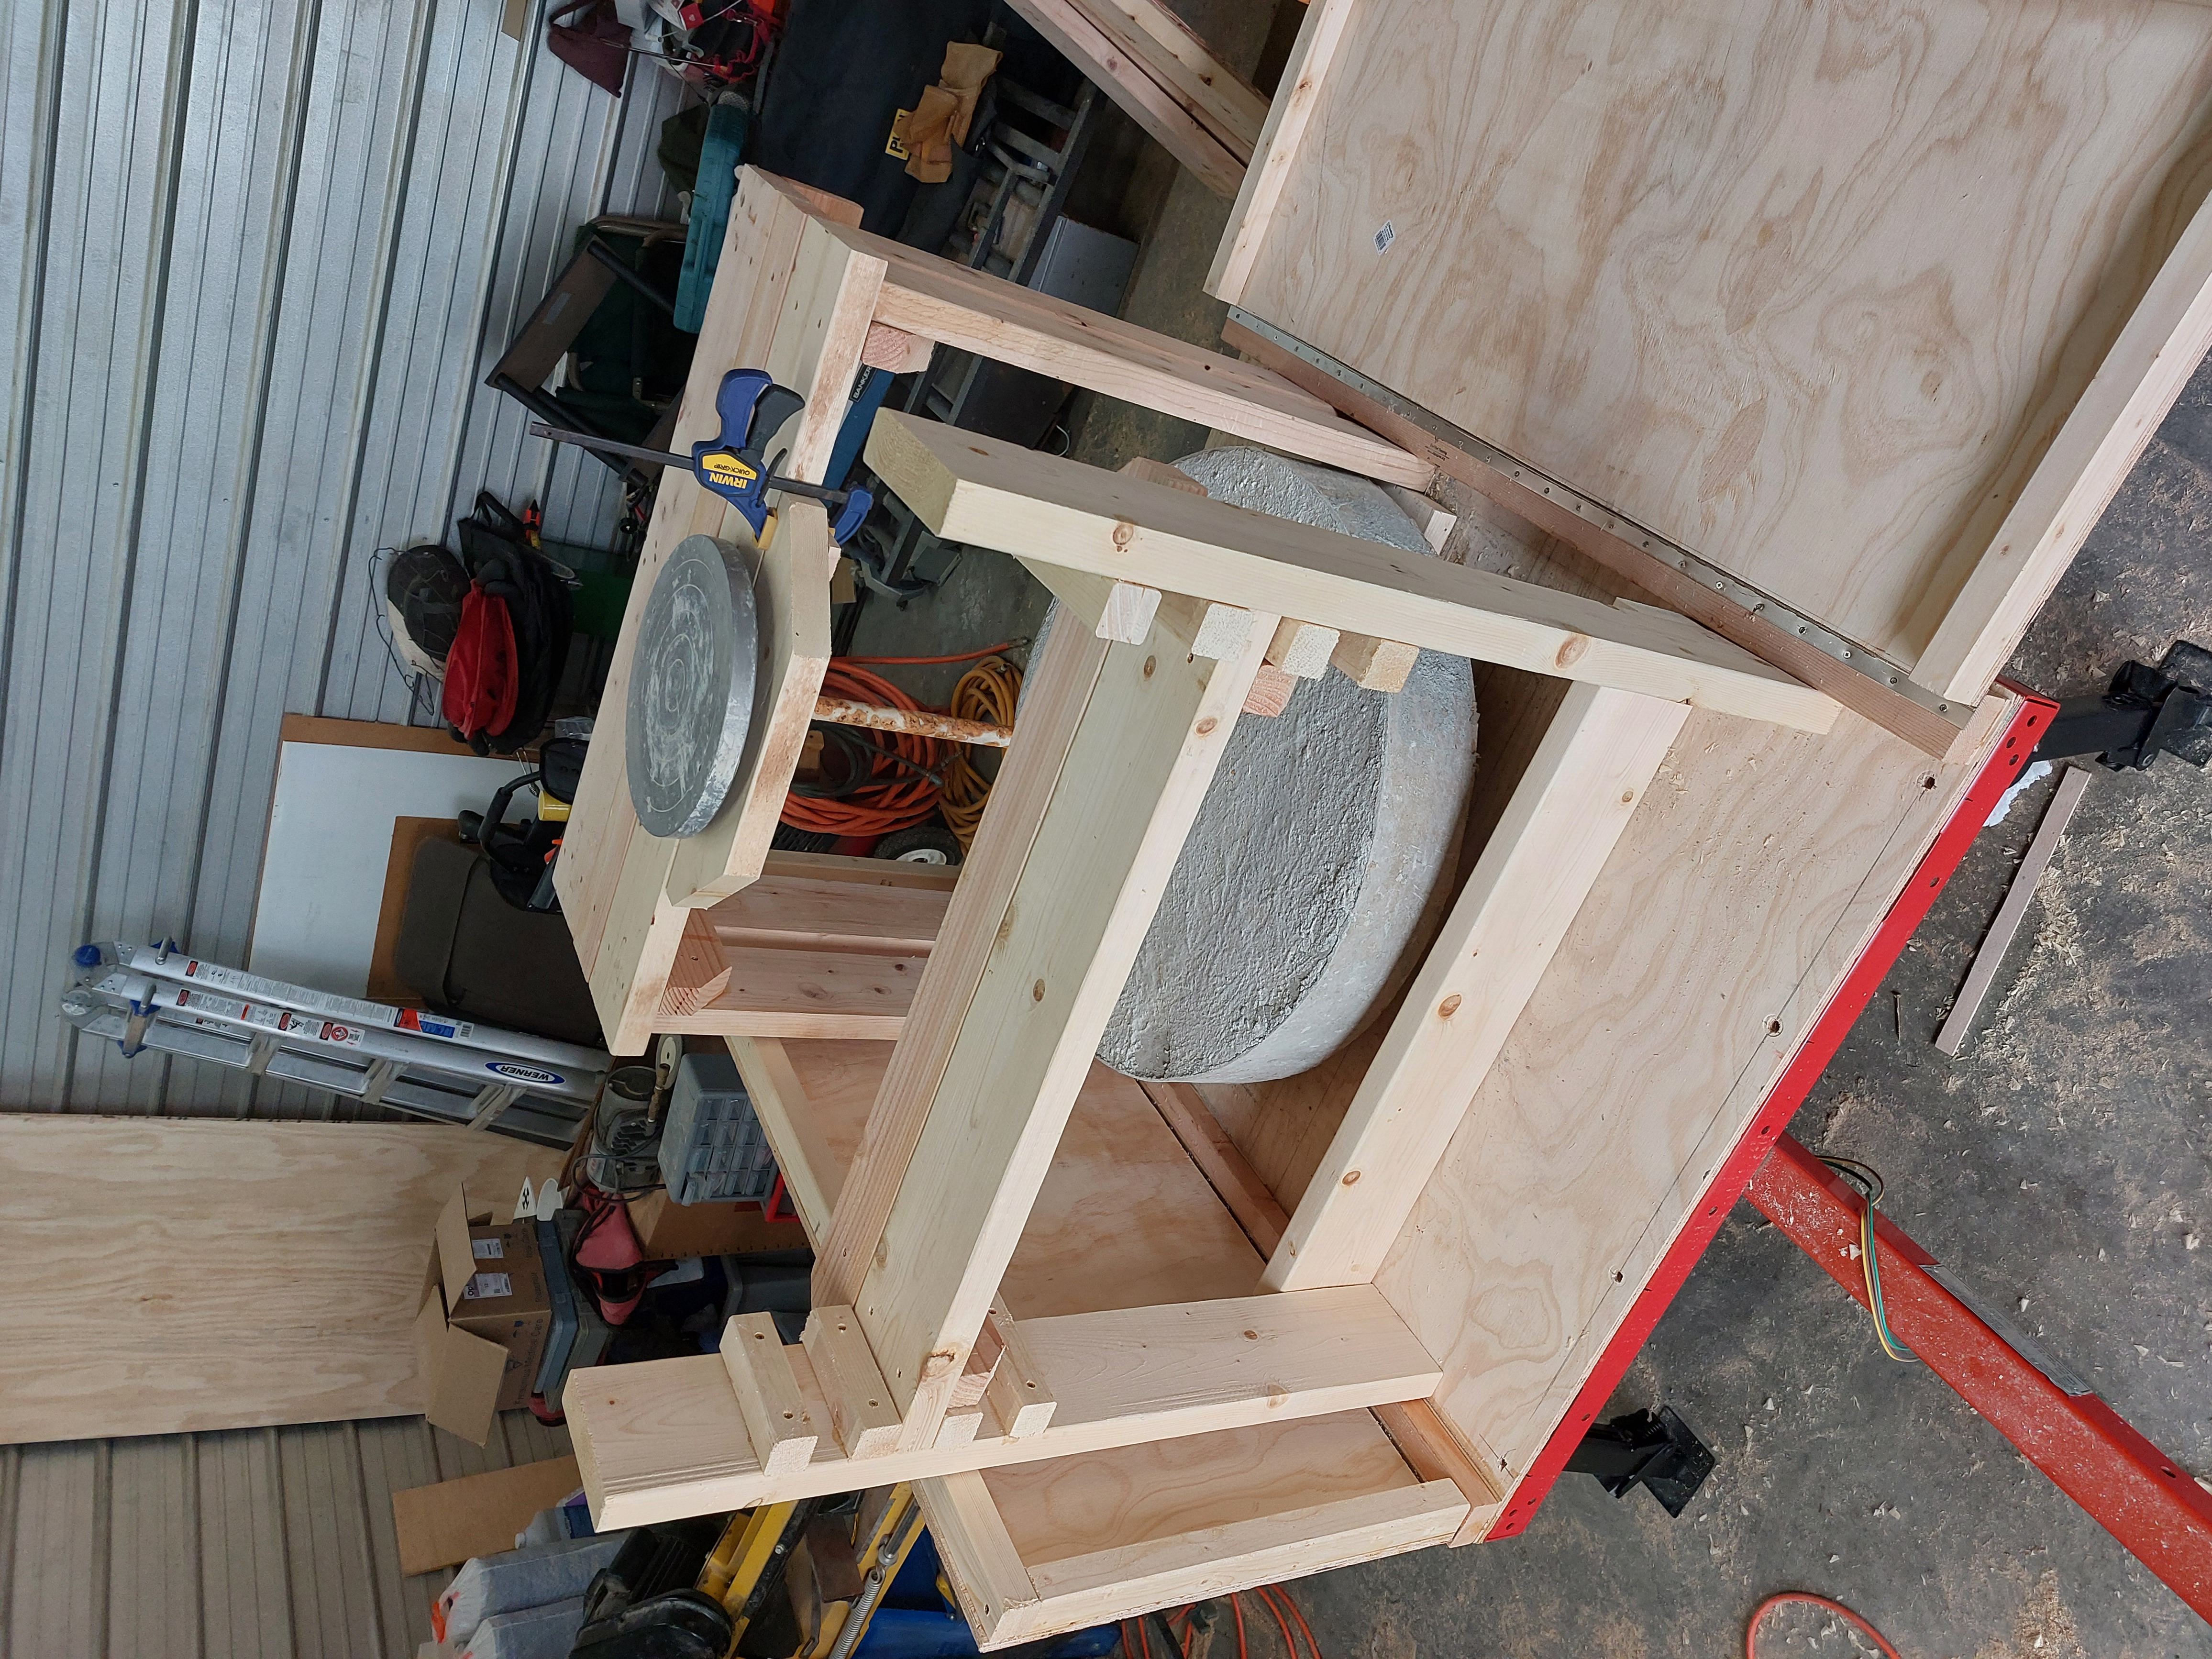
Folding the sides down makes some additional display space and a way to more comfortably get seated on the kick wheel.
This shows the intermediate steps in spacing and layout for the fold down sides.
Here (again) is a photo of the kick wheel and the fold down side during a test fit.
Published on Mar 1, 2025
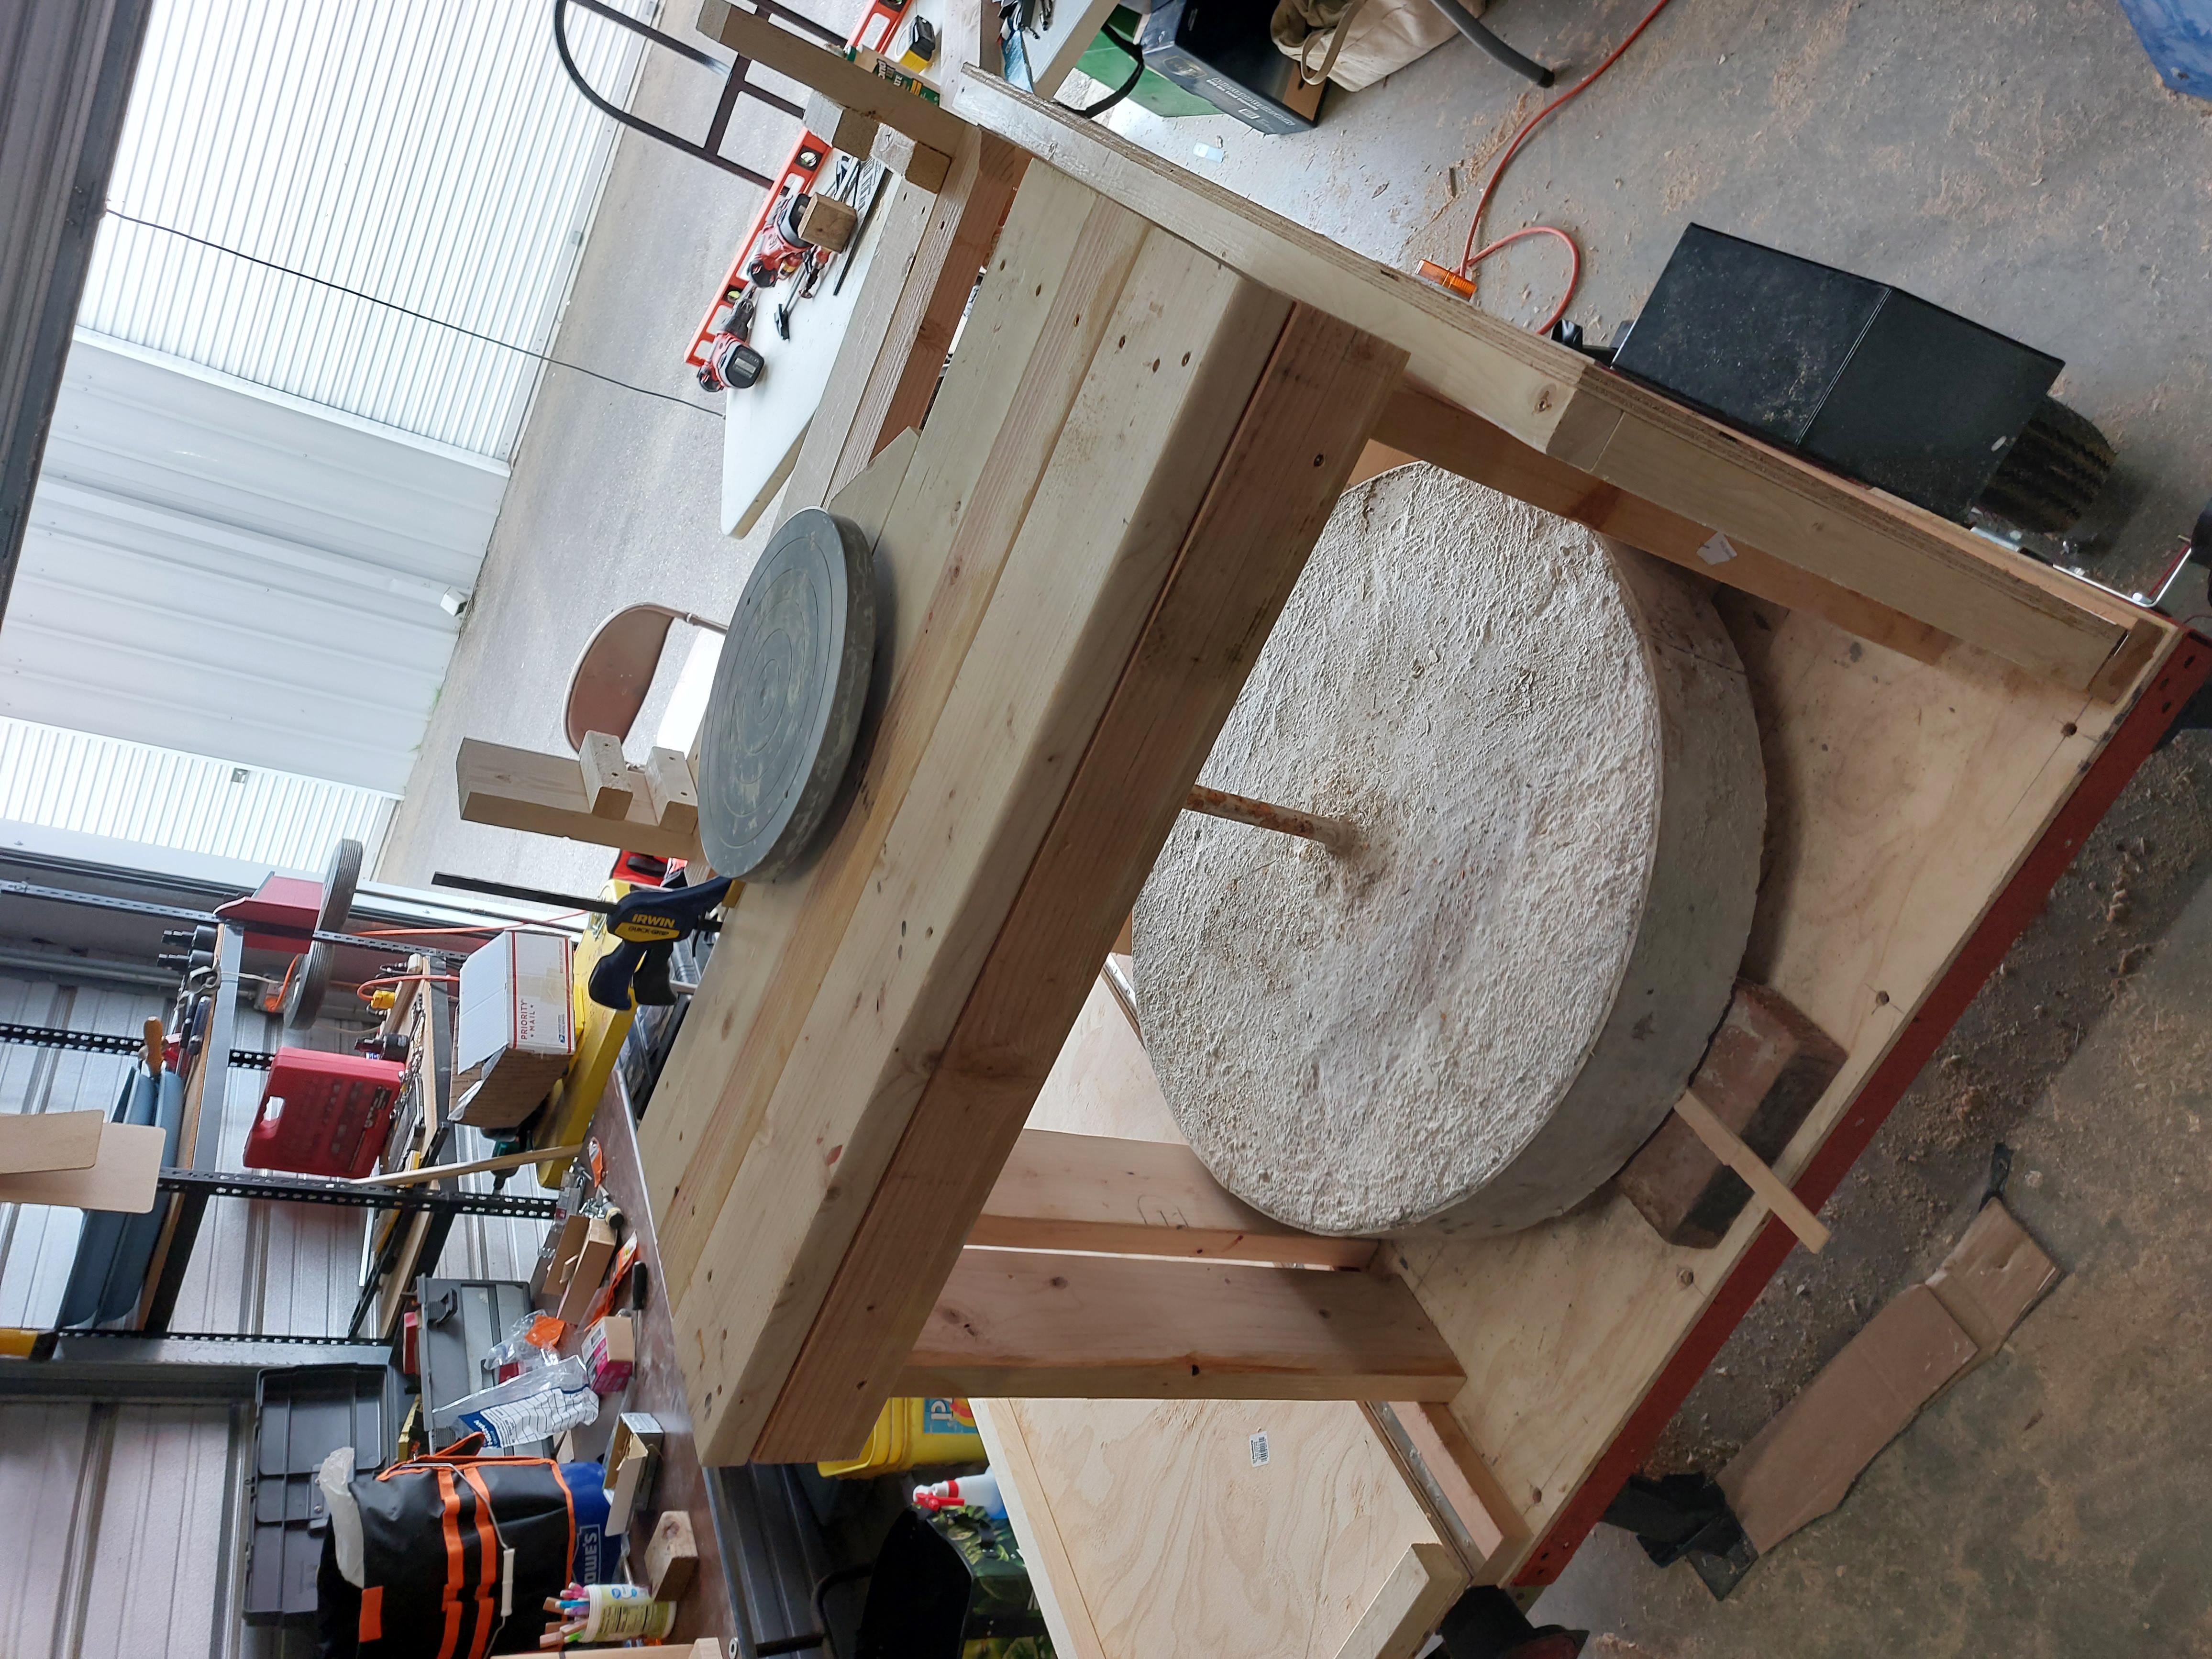
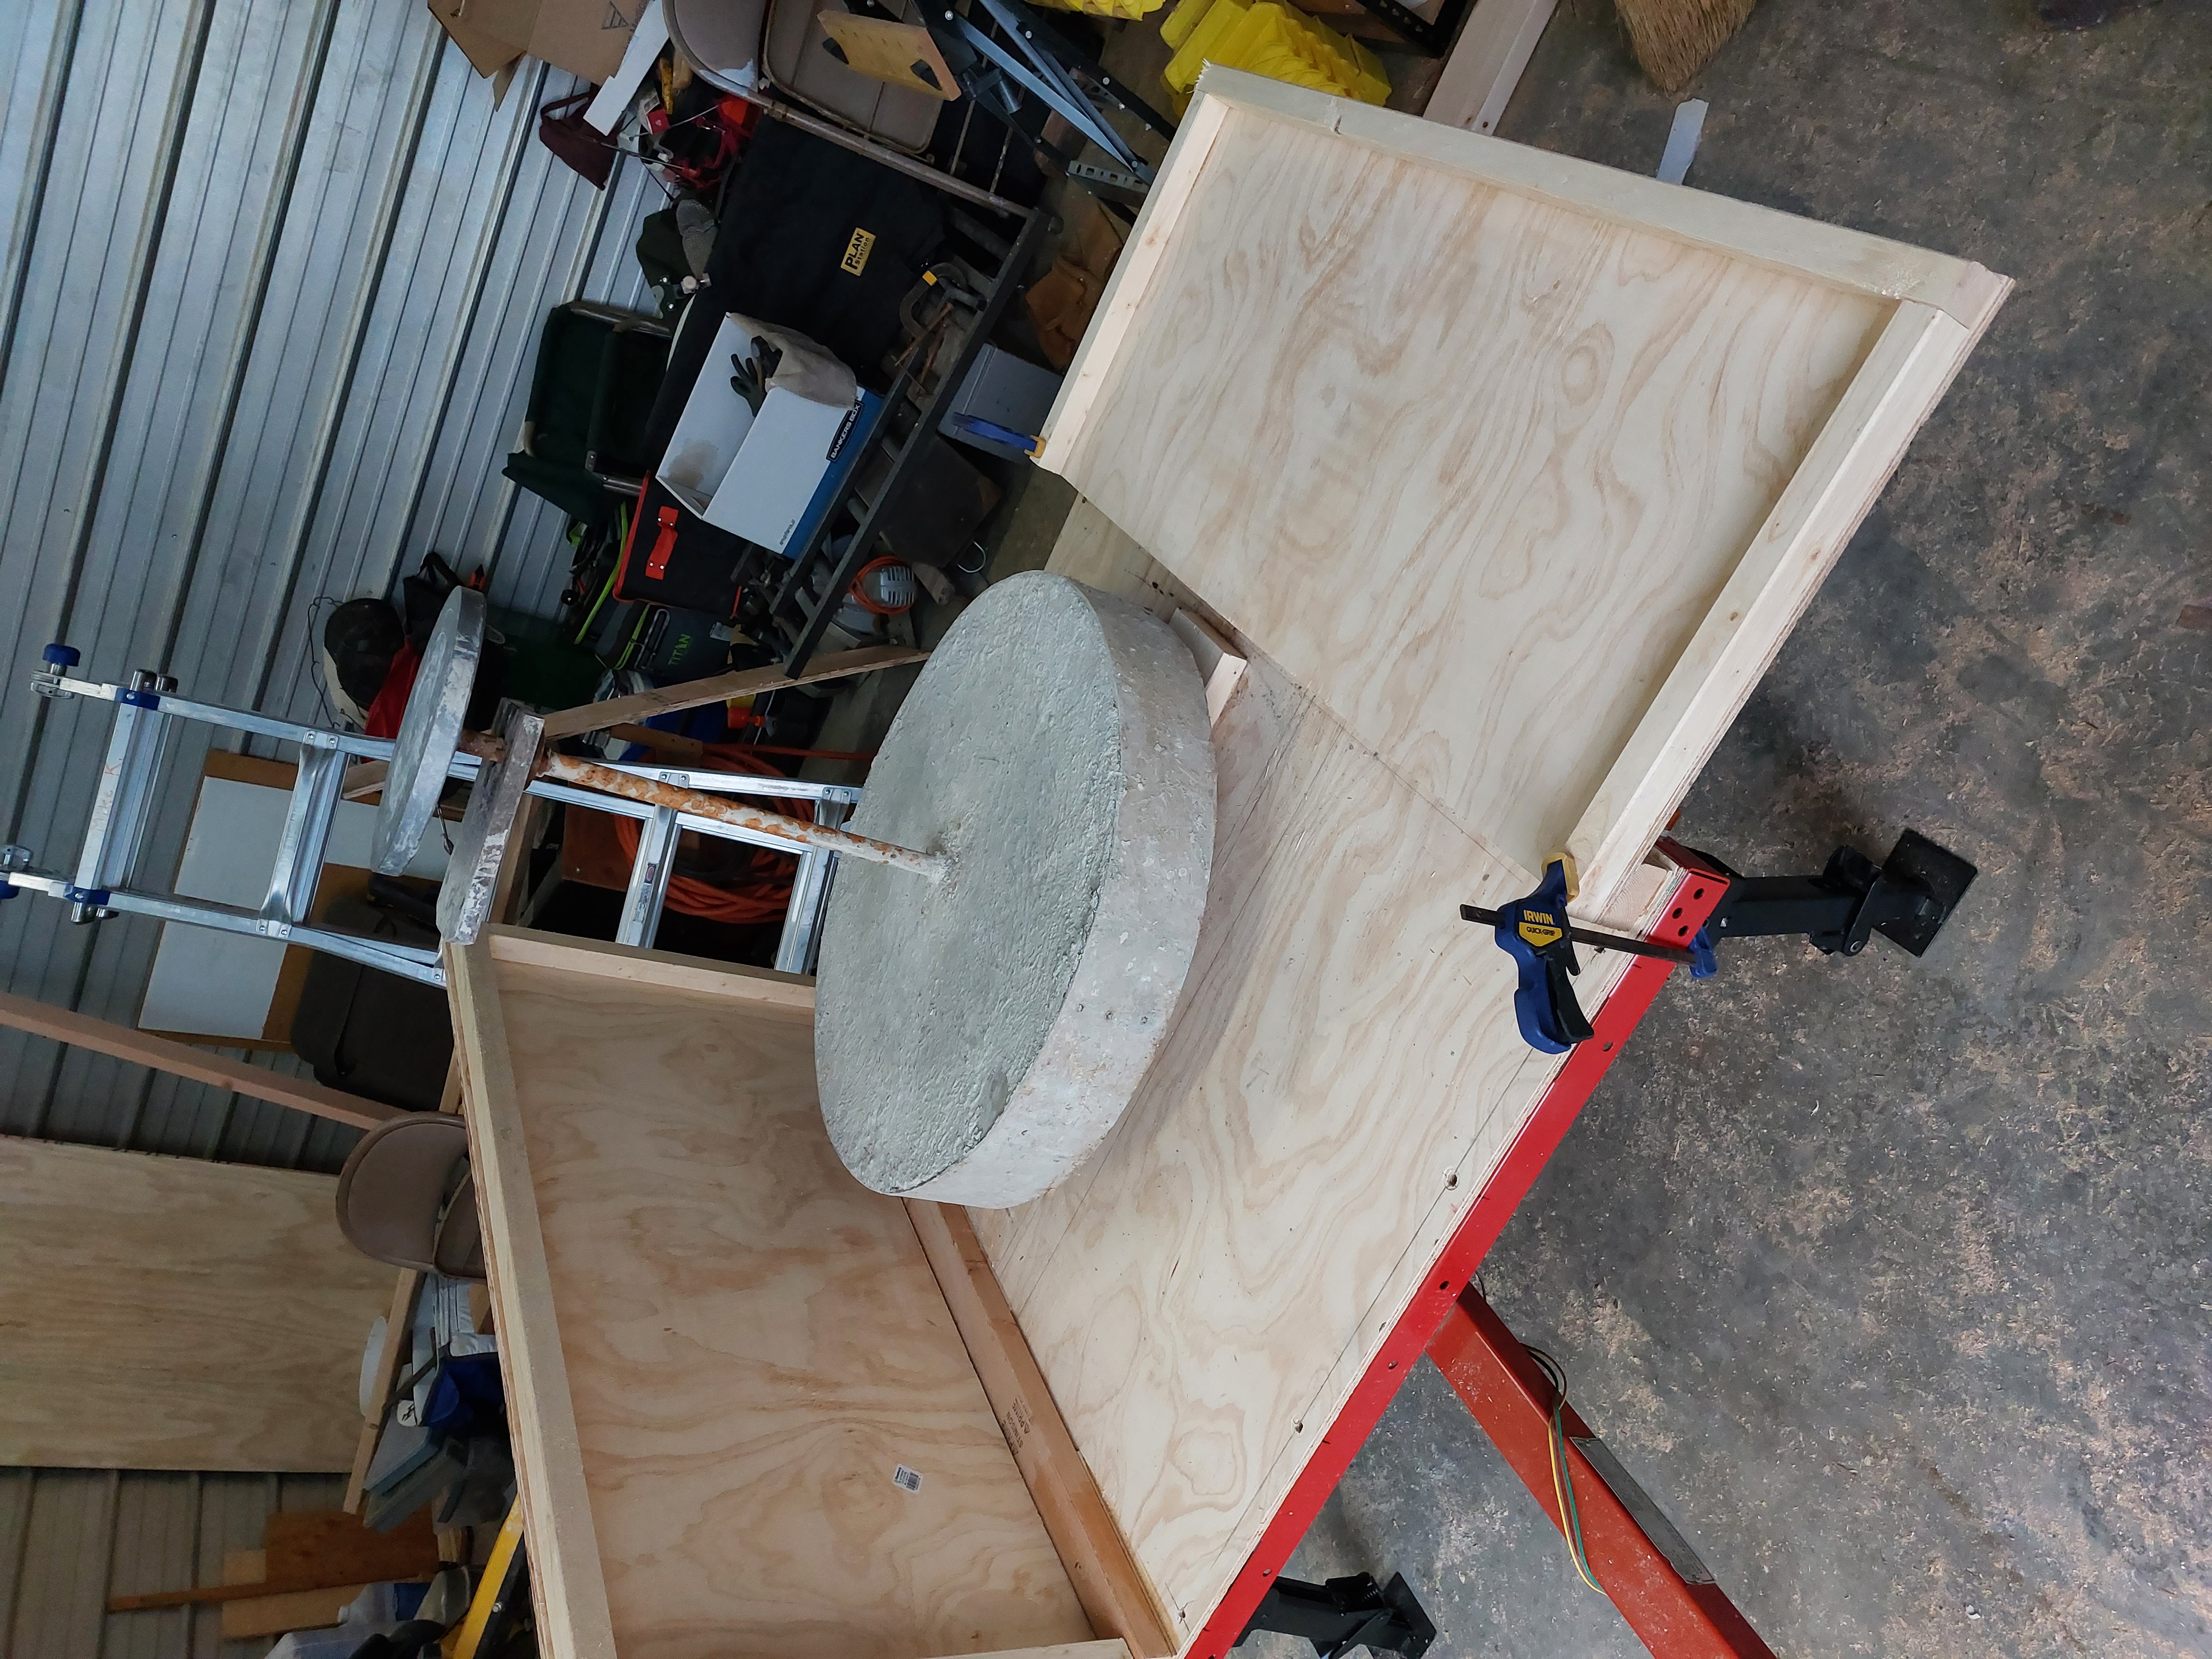
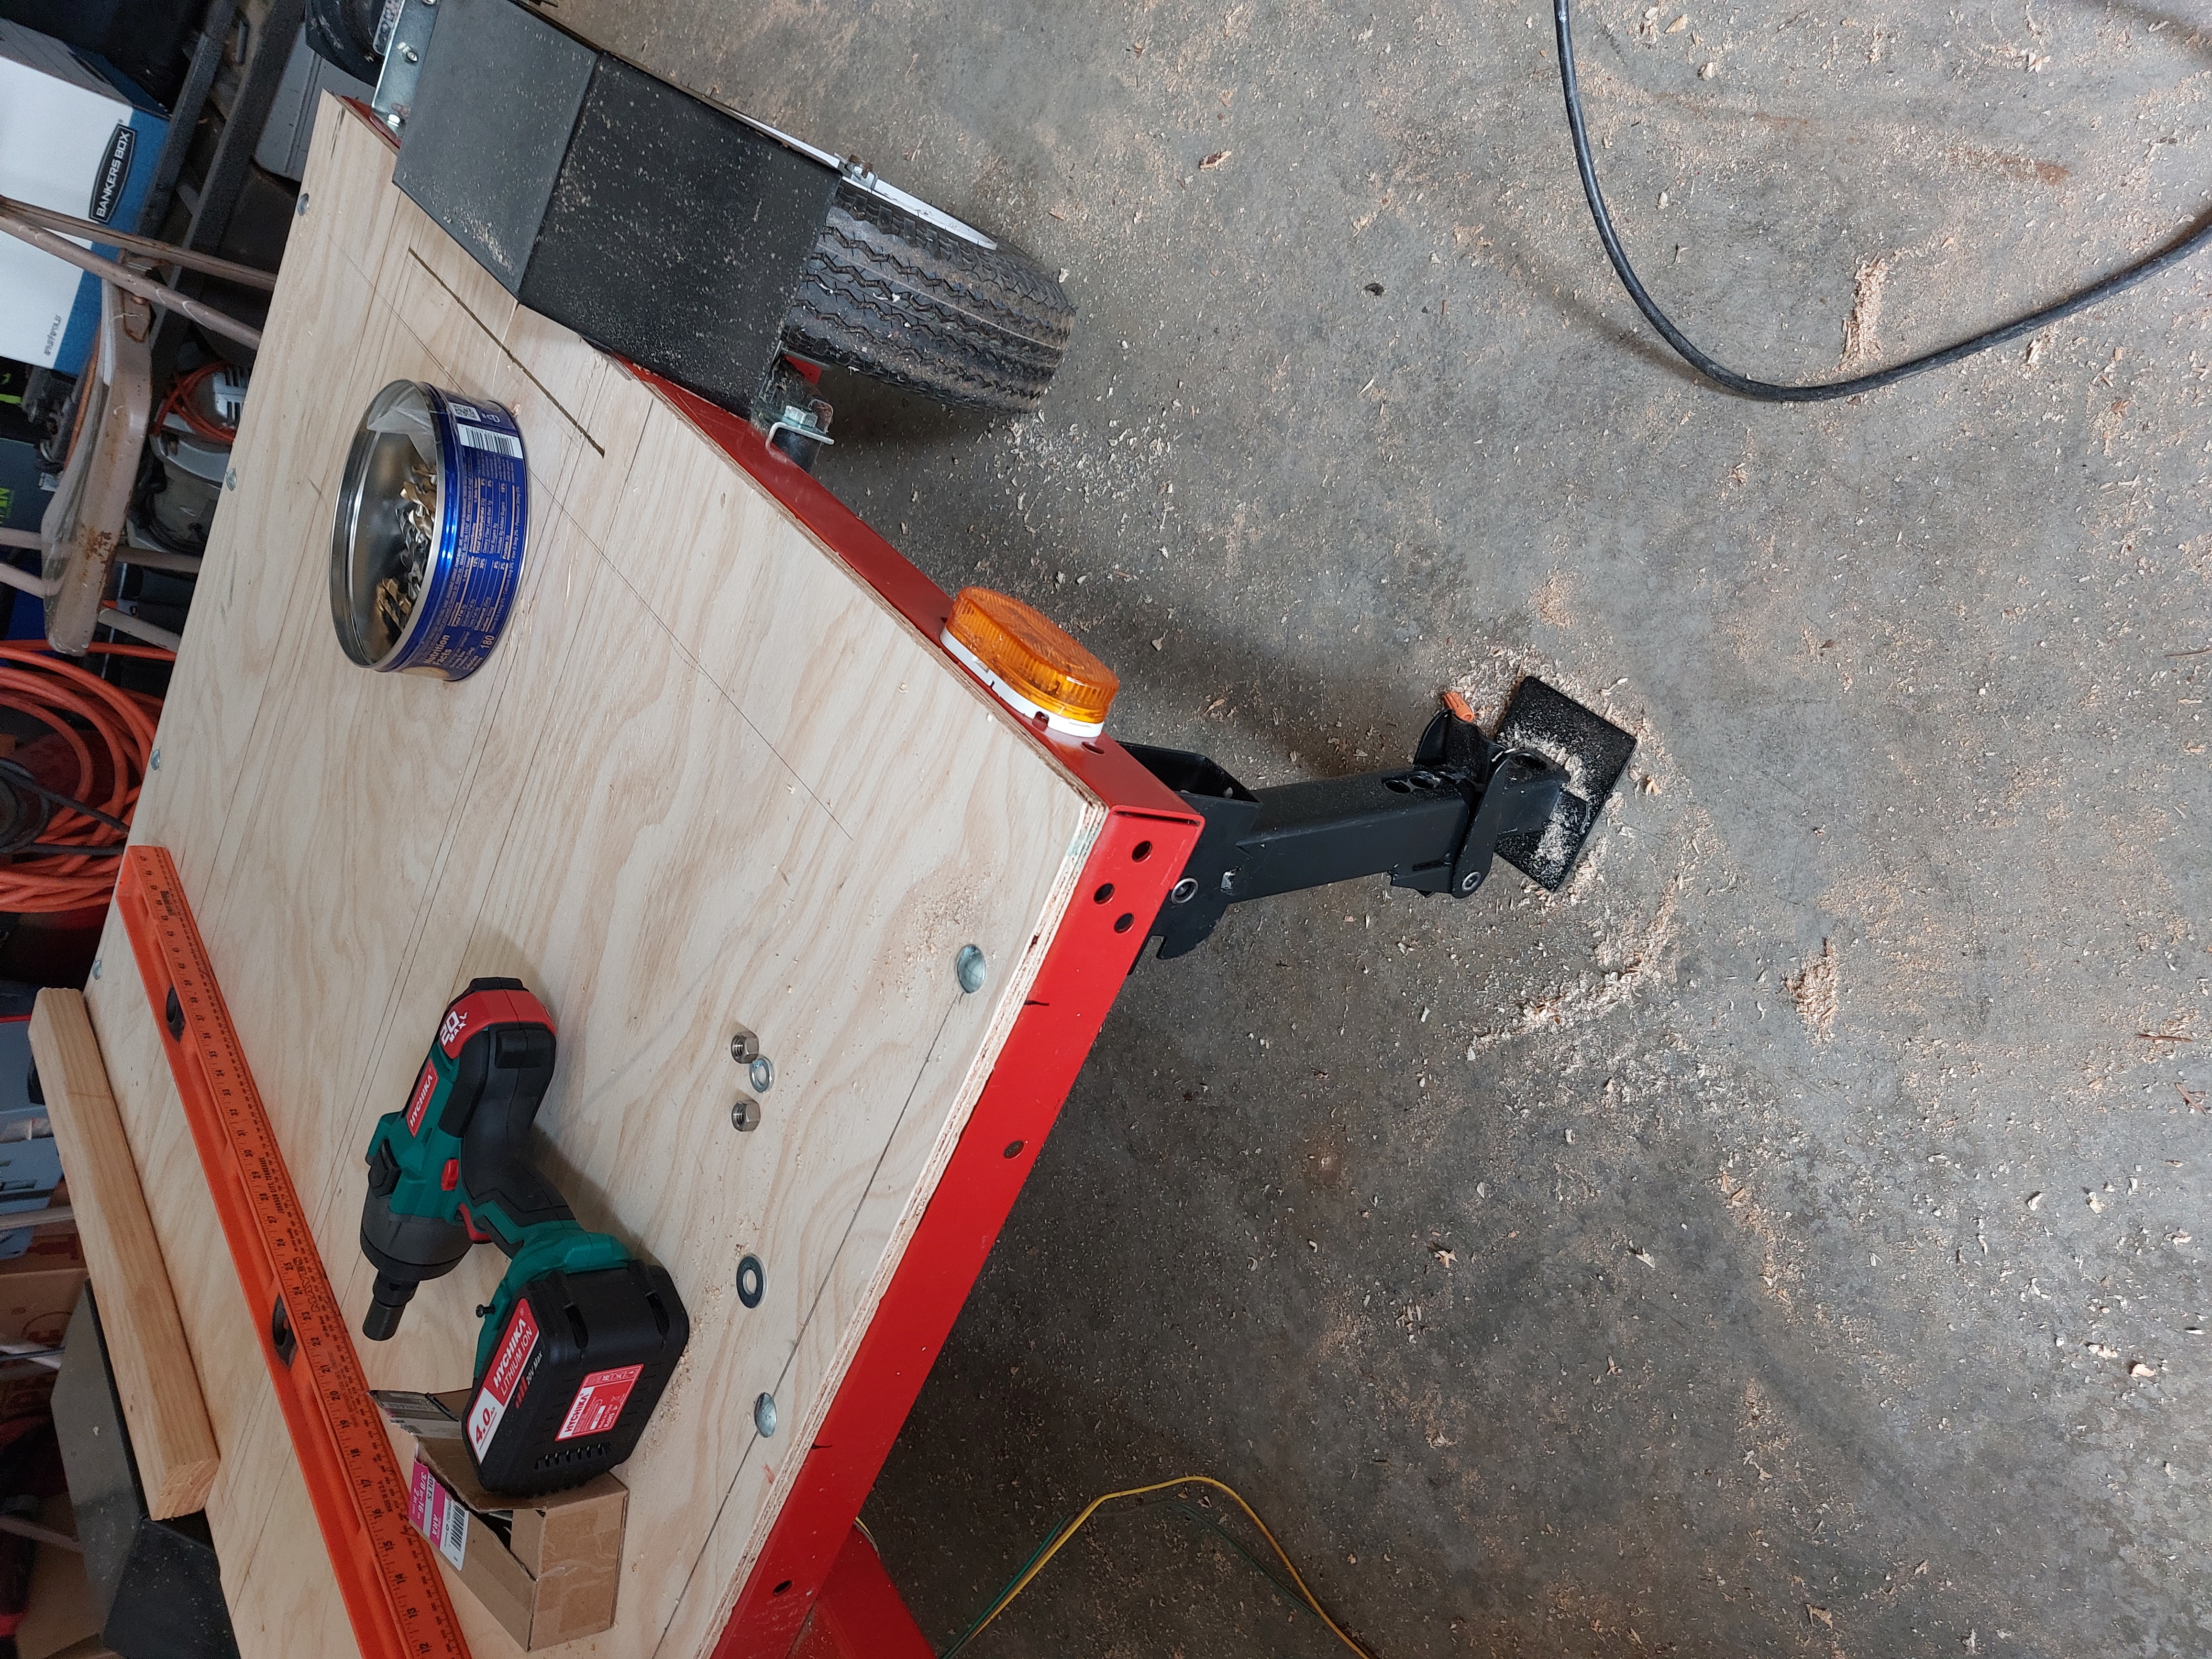
One of the early steps was mounting the kick wheel. It is VERY heavy! It is much easier to position early in the build with no obstructions. It is already mounted on a nice smooth bearing. The bearing is attached to a 2x6 length of lumber.
The wheel was positioned over a length of metal framing of thhe main trailer. Between the length of 2x6, the deck, and the frame underneath the wheel is more than adequately supported.
My greater concerns is the flexing of the deck. I may need to address that later but that depends on what I discover as the build continues.
This photo shows the side wall step but it also illustrates where the kick wheel was positioned.
This photo is less cluttered than later in the build so you can see how heavy this sucker is! The wheel is essesentially one big disk of concrete. Wendy didn't mess around when she wanted a kick wheel that could keep some momentum. :)
Published on May 28, 2022
The build has started and there is actually some progess to report.
Corner Jacks are installed to level and stabalize the trailer corners.
I did a little 'shimmery' to get everything extra level and have a nice uniform work surface.
I used roofing emulisifier to coat the bottom to protect and road proof the bottom.
The Deck is installed.
I'll be attaching fold down sides to extend over the fenders next.
Published on Jun 7, 2021
I knew wood prices had increased but it's ridiculous. The wheel itself will not be needed until the next demo. Purchases for assembly are purposefully delayed. Hopefully the price for wood products will come down a bit before then.
Published on May 23, 2021
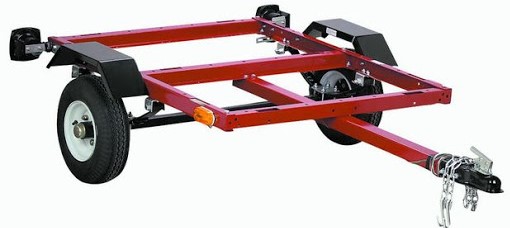
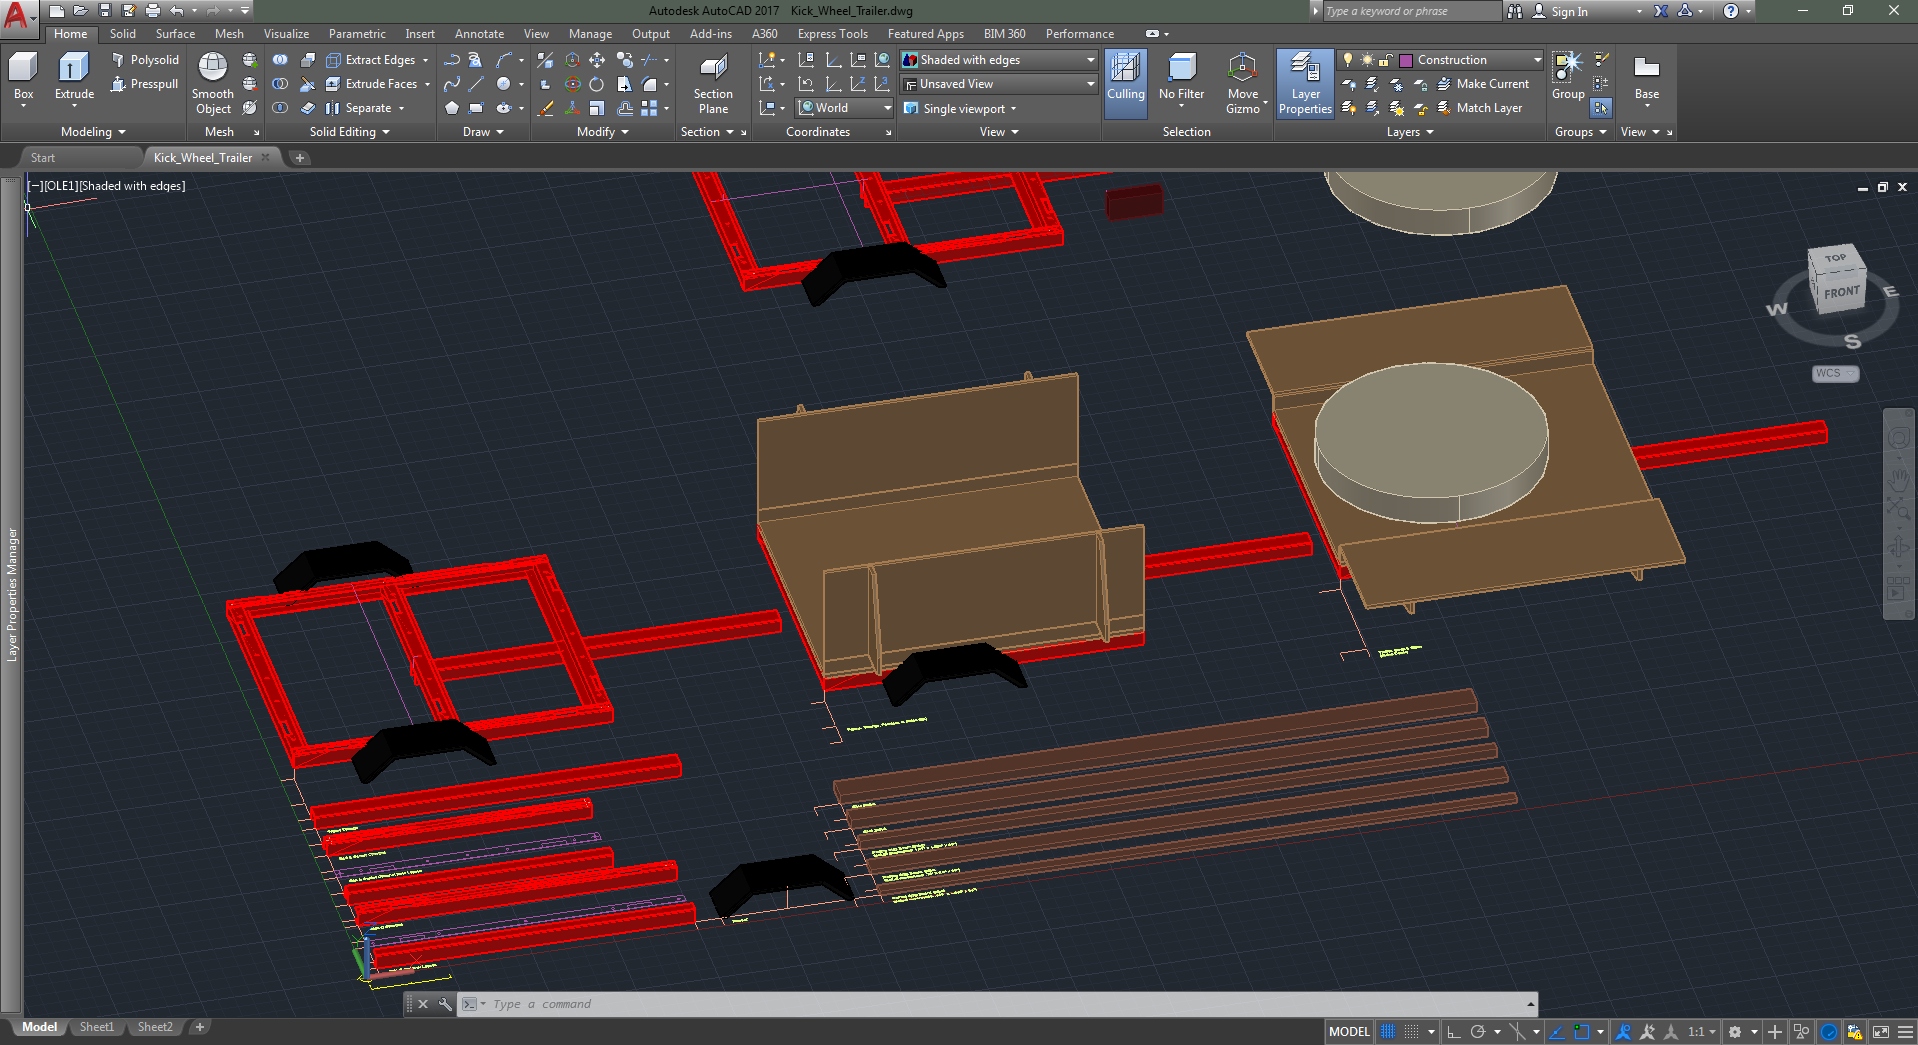
Double Checked the dimensions of the kickwheel and spindle. We will be building a new kick wheel frame and the trailer deck. We will be reusing the wheel that we cast last year. It's a heavy sucker and it's going to fill in a good bit of the trailer. I confirmed there is enough room and the weight will be centered over the axel.
We will be loading clay, water, and other bits in the front so the towing balance will be correct when on the road.
Click for Larger View
Drawing is nearly finished and certainly complete enough at this point to use for construction.
I have yet to draw the frame but it will look very similar to this one.
https://www.instructables.com/Potters-Kick-Wheel/
We may decide to make a bench or use a seperate seat. That is not determined yet
Gwen asked for a splash gaurd so I'll add that as well. She may have some ideas about that would simplify what I need to install. I'm not to worried about actually constructing or fabricating that bit yet.
I'll annotate the drawing with dimensions and construction comments before this next weekend.